Friday, September 27, 2013

Seeing Red


There has been a lot of red happening around here.  A garden full of tomatoes means more canning and drying than I care to do right now.  Yet, I still really want home canned tomatoes all winter...want to come can for me?


I started a tradition years and years ago that the kids and I would go out to dinner one night if my husband was out of town on a business trip.  Then a few years ago I told myself that I could either go out to dinner or buy the equivalent  dollar amount in fabric.  So this year as my husband drove around the mid-west looking at corn, I made dinner and treated myself to some fabric.  :)  I have had this quilt on my mind for awhile and bought some vintage inspired Christmas fabrics to make it.


 I also bought some great reds to make up into a tree skirt for Christmas.  Yes, he was out of town tons this month!  I am going to make the tree skirt using my Diamond Quilt tutorial.  I have to say it was really handy to re-read the tutorial and not have to figure out how many diamonds to cut.


I have been using the cutting scraps to make this red and white hexi slab.  I think it wants to be a pillow.  Yep, I have Christmas on the mind, but if I don't start now it will be another Christmas with a random piece of fabric wrapped around the tree.


But I haven't totally forgotten about fall.  We went and picked some apples at a friend's house yesterday.  So this weekend we will be making applesauce and apple pie.  I love this time of year!


Tuesday, September 24, 2013

Update and Quick & Easy Charity Quilt Library

I spent a wonderful Saturday sewing with the Des Moines Modern Quilt Guild.  It is always fun to hang out with friends, but sewing with friends brings it to the next level of awesome.  I haven't taken pictures of what I worked on yet, but will share that soon.

I also ordered fabric for a Christmas quilt and tree skirt last week.  I can't wait to make them up!  I am going to use my Diamond Quilt tutorial for the tree skirt.  But the real reason I am posting...


Today I wanted to let you know that I have a page where you can link up any great Quick & Easy Quilt Tutorials you have found around the inter-web.  (I am hil-ar-i-ous.)  I have linked just a few so far.  Feel free to link as many as you would like.  It can be our own community Pintrest board.  I hope it can become a resource for people looking for easy quilts for charity or gifts.

Thanks!

Friday, September 20, 2013

Quick and Easy Charity Quilts - Applique


 When I first started quilting I never thought I would do applique.  Too hard.  Too fussy.  Not happening!  But it turns out it really isn't that bad and applique can add a great pop of color and interest to a simple piece of fabric.  Here are two examples of simple whole cloth quilts that have been dressed up with applique.


First up, this great Air Force print with an airplane made by my guild-mate Sherry.  It is backed with the fuzziest brown flannel.   Perfect for snuggling!


Sherry appliqued on two layers of fabric and satin stitched around them.  Beautiful work.


For this quilt top, I took three hexagon flowers I had made years ago and zigzagged them onto some pale yellow fabric.  Applique can be a great way to use up those orphan hexagons too.  ;)


If you want to make and applique your own hexagon flowers I wrote a tutorial as part of the Skill Builder Sampler.  Just change the size of hexagon you print out to 2 inches.


If you want to know more about how to applique by machine, Julie, The Crafty Quilter, has an amazing series on applique.  Seriously, the third post will teach you everything you need to know about using different machine stitches in applique.
Part 1:  Terminology
Part 2:  Machine Applique with fusibles 
Part 3:  Machine Applique Stitches


So, only a week and a half left in September!   Have you made any quilts for charity this month yet?  On October 1st I will have a link up and prize drawing for anyone who has made a quilt for charity in the month of September.


You could win a $20 dollar gift certificate from the Fat Quarter Shop and a set of Owl note cards from my wonderful friend Lisa Orgler.

Tomorrow we are having a sew-in as a guild and I can't wait to get sewing!  :)


Wednesday, September 18, 2013

Protect the Children

On a more serious note:
This month as I have been sharing Quick & Easy Charity Quilt ideas I have thought about the children in the foster care system our guild will be donating the quilts to.  As I thought of them, a talk by Dallin H. Oaks, a church leader, has been on my mind.  He spoke about the need for adults to watch over and protect children.  I would like to share a few quotes from his talk that stood out to me:
We can all remember our feelings when a little child cried out and reached up to us for help. A loving Heavenly Father gives us those feelings to impel us to help His children. Please recall those feelings as I speak about our responsibility to protect and act for the well-being of children...
Childhood abuses or neglect of children that occur after birth are more publicly visible. Worldwide, almost eight million children die before their fifth birthday, mostly from diseases both treatable and preventable.  And the World Health Organization reports that one in four children have stunted growth, mentally and physically, because of inadequate nutrition...
Even in rich nations little children and youth are impaired by neglect. Children growing up in poverty have inferior health care and inadequate educational opportunities. They are also exposed to dangerous environments in their physical and cultural surroundings and even from the neglect of their parents. Elder Jeffrey R. Holland recently shared the experience of an LDS police officer. In an investigation he found five young children huddled together and trying to sleep without bedding on a filthy floor in a dwelling where their mother and others were drinking and partying. The apartment had no food to relieve their hunger. After tucking the children into a makeshift bed, the officer knelt and prayed for their protection. As he walked toward the door, one of them, about six, pursued him, grabbed him by the hand, and pleaded, “Will you please adopt me?”...
When we consider the dangers from which children should be protected, we should also include psychological abuse. Parents or other caregivers or teachers or peers who demean, bully, or humiliate children or youth can inflict harm more permanent than physical injury. Making a child or youth feel worthless, unloved, or unwanted can inflict serious and long-lasting injury on his or her emotional well-being and development.  Young people struggling with any exceptional condition, including same-gender attraction, are particularly vulnerable and need loving understanding—not bullying or ostracism.  With the help of the Lord, we can repent and change and be more loving and helpful to children—our own and those around us.
Re-reading his talk today made me more determined to be kinder and more loving to my own children and to try to look for ways to love and support the children I come in contact with.  
I donate to charitable organizations and make quilts to donate, but somehow it seems like so little when faced with all the challenges in the world.  So will you help too?  Maybe your sphere of influence reaches farther than mine and you can do more.  Maybe with more people looking for opportunities to help more can be done to love and protect children around the world.  Children have no real control over their circumstances - it is up to us to help.
Thanks for letting me share.

Monday, September 16, 2013

Super-Size It! (a tutorial on how to super-size your own quilt)


One great way to make a quilt faster is to increase the size of the individual components.  For example, instead of sewing 2.5 inch squares together, why not sew 5 inch or even 10 inch squares together?  An added bonus?  A quilt made with larger blocks can be quite striking.

The jumbo granny square quilt above was made from 5 inch squares instead of the standard 2.5 inch pieces and measures about 36 x 36 inches.

Cross and Crown - For Sale at Terrain
This amazing quilt measures 62 x 64 inches!  I would love to have something like that on my bed!  It is simply one quilt block that has been super-sized.

Here are a few great super-sized quilt tutorials I have seen out there:
Giant Vintage Star Tutorial
Monster Sized Hexagon Quilt Tutorial
Super Sized Shoo-Fly Quilt Tutorial
Jumbo Tumbler Quilt Tutorial

But say you have a favorite block that you want to super size?  Here is how you do it:

  1. Decide what block you want to super-size
  2. Decide how large you want your quilt to be (be flexible)
  3. Decide how many blocks you want in the finished quilt.  Do you want one huge block?  Four giant blocks or a 2 x 3 layout of 6 blocks?
Say you have a 12 inch block you want to super-size and you want a quilt that is about 74 inches square and you want to make it out of 4 blocks.  That would mean that each block would have to be about 37 inches square.  37 is an awkward number, so lets round down to 36 inches and be content with a 72 inch quilt.

Thankfully, 12 goes into 36 three times.  Our super-sized block is three times larger than the original block.

But how large to cut your pieces?  Can you just multiply everything by 3?  Not quite.  
  1. First, subtract off the seam allowances 
  2. Then multiply by three (or how ever many you need to) and 
  3. Add back on the seam allowances
Square and rectangular pieces will have a seam allowance of .5 inches (.25 for each side) that needs to be subtracted off.

Half square triangles need to have 7/8ths of an inch subtracted off.


So...take each pattern piece, subtract off the seam allowance, multiply by 3 then add the seam allowance back on and complete the block as the pattern instructs.

Need the quilt to be a bit bigger?  You could add some sashing between the block or add a border.


So easy, so fast and so striking!  
A win-win!  
Have you ever super-sized a quilt?

Saturday, September 14, 2013

Quilt As You Go


This Quick & Easy Charity Quilt uses the quilt-as-you-go method of construction.  QAYG means that you sew the quilt pieces together on top of the batting and backing so the quilting and piecing are done at the same time.  Using this method, it took me about 3 hours to complete the quilt.  Because the quilt is loosely quilted it is very soft and flexible.  Perfect for snuggling.


To make this quilt you will need:
A piece of backing fabric.  Mine was 44 x 62.
Eight inch wide strips of fabric.  I used eight.
And batting.

You can use any size strip you would like - the smaller the strip width, the more you will need.  Make sure the strips are no wider than the maximum quilting distance required by your batting.  My batting said that it needed to be quilted every 9 inches.  So I chose to use an 8 inch strip.

Place your batting on the table or ground and smooth out all of the wrinkles.  It is a good idea to tape down the edges in a few places to keep it from shifting.


 Spray the batting with spray adhesive.

Lay the backing over the batting.  Smooth out any wrinkles and spray more adhesive along the edges if they aren't stuck down properly.


Trim off the batting that extends beyond the edges of the fabric.
Roll up the batting/backing so it is easier to manage.
Place your strips in the order you want them to go on the quilt.

 Lay your first strip of fabric along the bottom of the batting right side up.

 Lay the second piece of fabric right side down on top of the first piece.
Pin along the edges.

 Stitch along the edge using a walking foot and generous 1/4 inch seam.  You may even want to use a 1/2 inch seam.  (I started out with a regular foot but switched it out for a walking foot almost immediately.)

Remove the pins and open the fabric.  Iron.


Pin the next strip of fabric face down onto the second strip.  Stitch. 

 Repeat until you come to the end of the backing/batting.
At this point I top stitched a few pieces of rickrack along the seams.  I love rickrack!


Square up the quilt and bind.
You are done!
A super cute quilt finished in an afternoon.  
It doesn't get much better than that!


Wednesday, September 11, 2013

Orphan Blocks + Negative Space = Quick Twin Sized Quilt


As part of Quick & Easy Charity Quilt Month here, I wanted to show how just a few blocks could be made into a good sized quilt.  I knew when our guild decided to make blankets for children in foster care I wanted to make a twin sized quilt.  (I think teens sometimes get overlooked and babies get tons of quilts.)  But I knew the quilt couldn't be super complicated or else I would never finish it.

The beauty of this quilt is that it uses orphan blocks (you know, the ones you have abandoned in the bottom of your drawer  ;) ) and a bunch of negative space to make a large sized quilt.  Since the quilt blocks are already made, the time needed to complete the quilt was minimal.


These quilt blocks were from a Block of the Month Club at my LQS from 2003.  Yeah, ten years old.  It was time to stop storing them and give them a new life.  Here's what I did:


  1. I started by sewing four blocks together with 2.5 inch strips of fabric between them.  Then I sewed the block panel to a large chuck of fabric that was 44 inches wide.
  2. Next I sewed the lower three blocks together with 2.5 inch stripes of background fabric.  Added a piece of fabric to the end that was as tall as the blocks and sewed that strip to the bottom of my first piece.
  3. Then I added a 10 inch strip to the top.
  4. And the bottom.
  5. And sewed a 2.5 inch strip along the right hand side.


Here are some examples of other ways you could use your orphan blocks to make a larger sized quilt.  The possibilities are endless.   What about blocks around all the outer edges?


Now I've just got to get it quilted.  Maybe with Denyse Schmidt inspired figure eights?


http://swimbikequilt.com/2013/07/100-quilts-for-kids-charity-quilt-drive-starts-today.html


I just heard that Katie at Swim, Bike, Quilt is finishing off her 100 Quilts for Kids quilt drive at the end of the month.  Read more about it here - there are lots of prizes for donating a quilt to charity.  

Don't forget that I will be having a link up - with more modest prizes :) - at the end of the month too.  Let's get sewing!

Monday, September 9, 2013

Easy-Peasy Two Fabric Blanket


I made this type of blanket for the first time when we lived in Texas.  I needed a very lightweight blanket for my toddler so I simply pinned two pieces of quilting cotton right sides together, sewed around the edges (leaving a bit of a gap), flipped it right side out and stitched around the edges.  We still have it and it makes a great lightweight summer blanket.  

You can make this type of blanket from any two pieces of fabric.  Two pieces of flannel make great baby blankets!  But this time I wanted to make something heavier and supper soft.

I choose a piece of fleece and super soft monkey corduroy.  I also picked up some rickrack and matching thread for the edging.

For this blanket you will need:

  • 1 2/3 yards of corduroy (44 x 60 inches)
  • 1 1/4 yards of fleece (45 x 60 inches)
  • 6.5 yards of rickrack 
(Or use any two pieces of fabric that are the same size)


Step 1:  Trim off the selvages and square up the fabrics to the same size.
Step 2:  Pin the fabric right sides together.

Step 3:  Place a bowl or plate on the corner and trace around it to round off the edge (this step is optional, but I like the look of a rounded edge).


Step 4:  Trim off the corner.

Step 5:  Using a 1/2 inch seam, stitch around the outside of the blanket.  Stop stitching about 12 inches from where you started.  You will want to leave a hole to turn the blanket right side out.

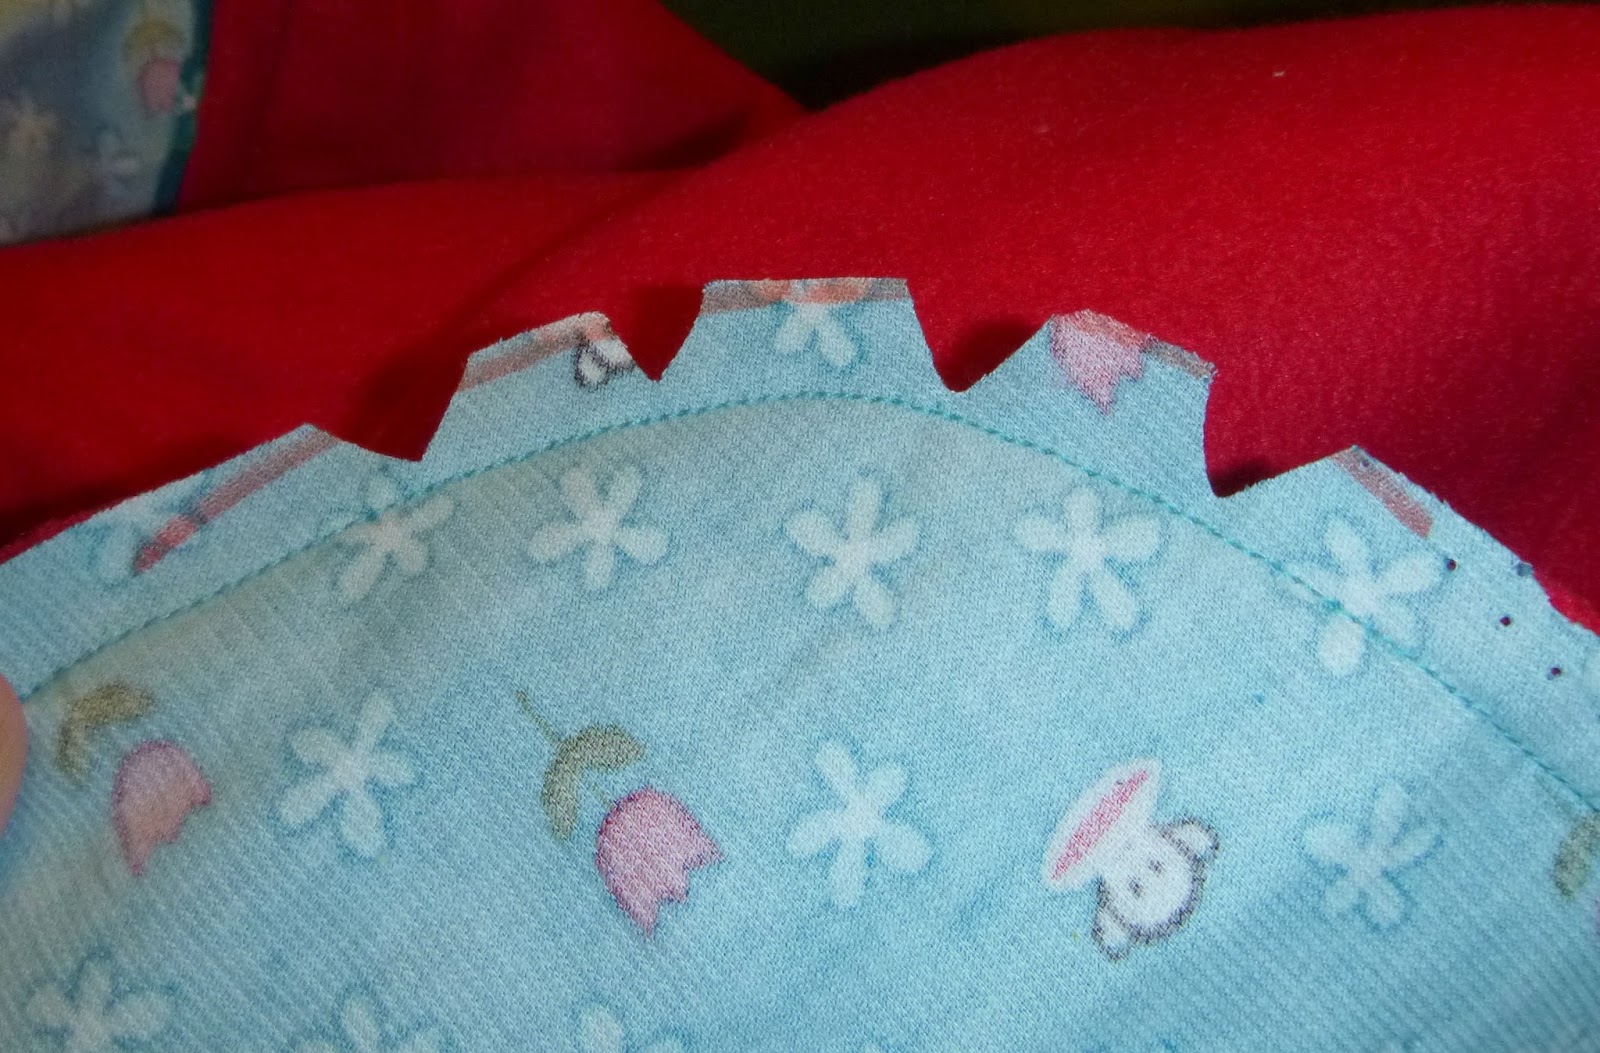
Step 6:  Make some notches along the curved corners.  This will help the fabric to lay flat when the blanket is turned right side out.
Step 7:  Turn the blanket right side out.

Step 8:  Fold the edges of the opening down and pin the opening closed.
If you are using fleece do not use an iron to press under!  Fleece melts!  Don't ask me how I know.  ;)

Step 9:  Stitch around the edge.  If desired you can place a piece of jumbo rickrack on the edge of the blanket and sew it on at the same time.

Step 10:  (Almost done!)  Your blanket looks pretty great right about now, but if you have a blanket that uses cuts of fabric larger than 1 yard, you will notice that the two fabrics will tend to shift and pull apart.   So in this step we are going to machine tie the fabric together.

Measure out a grid on the quilt and make a mark every foot or so with a pin or washable fabric marking pen.

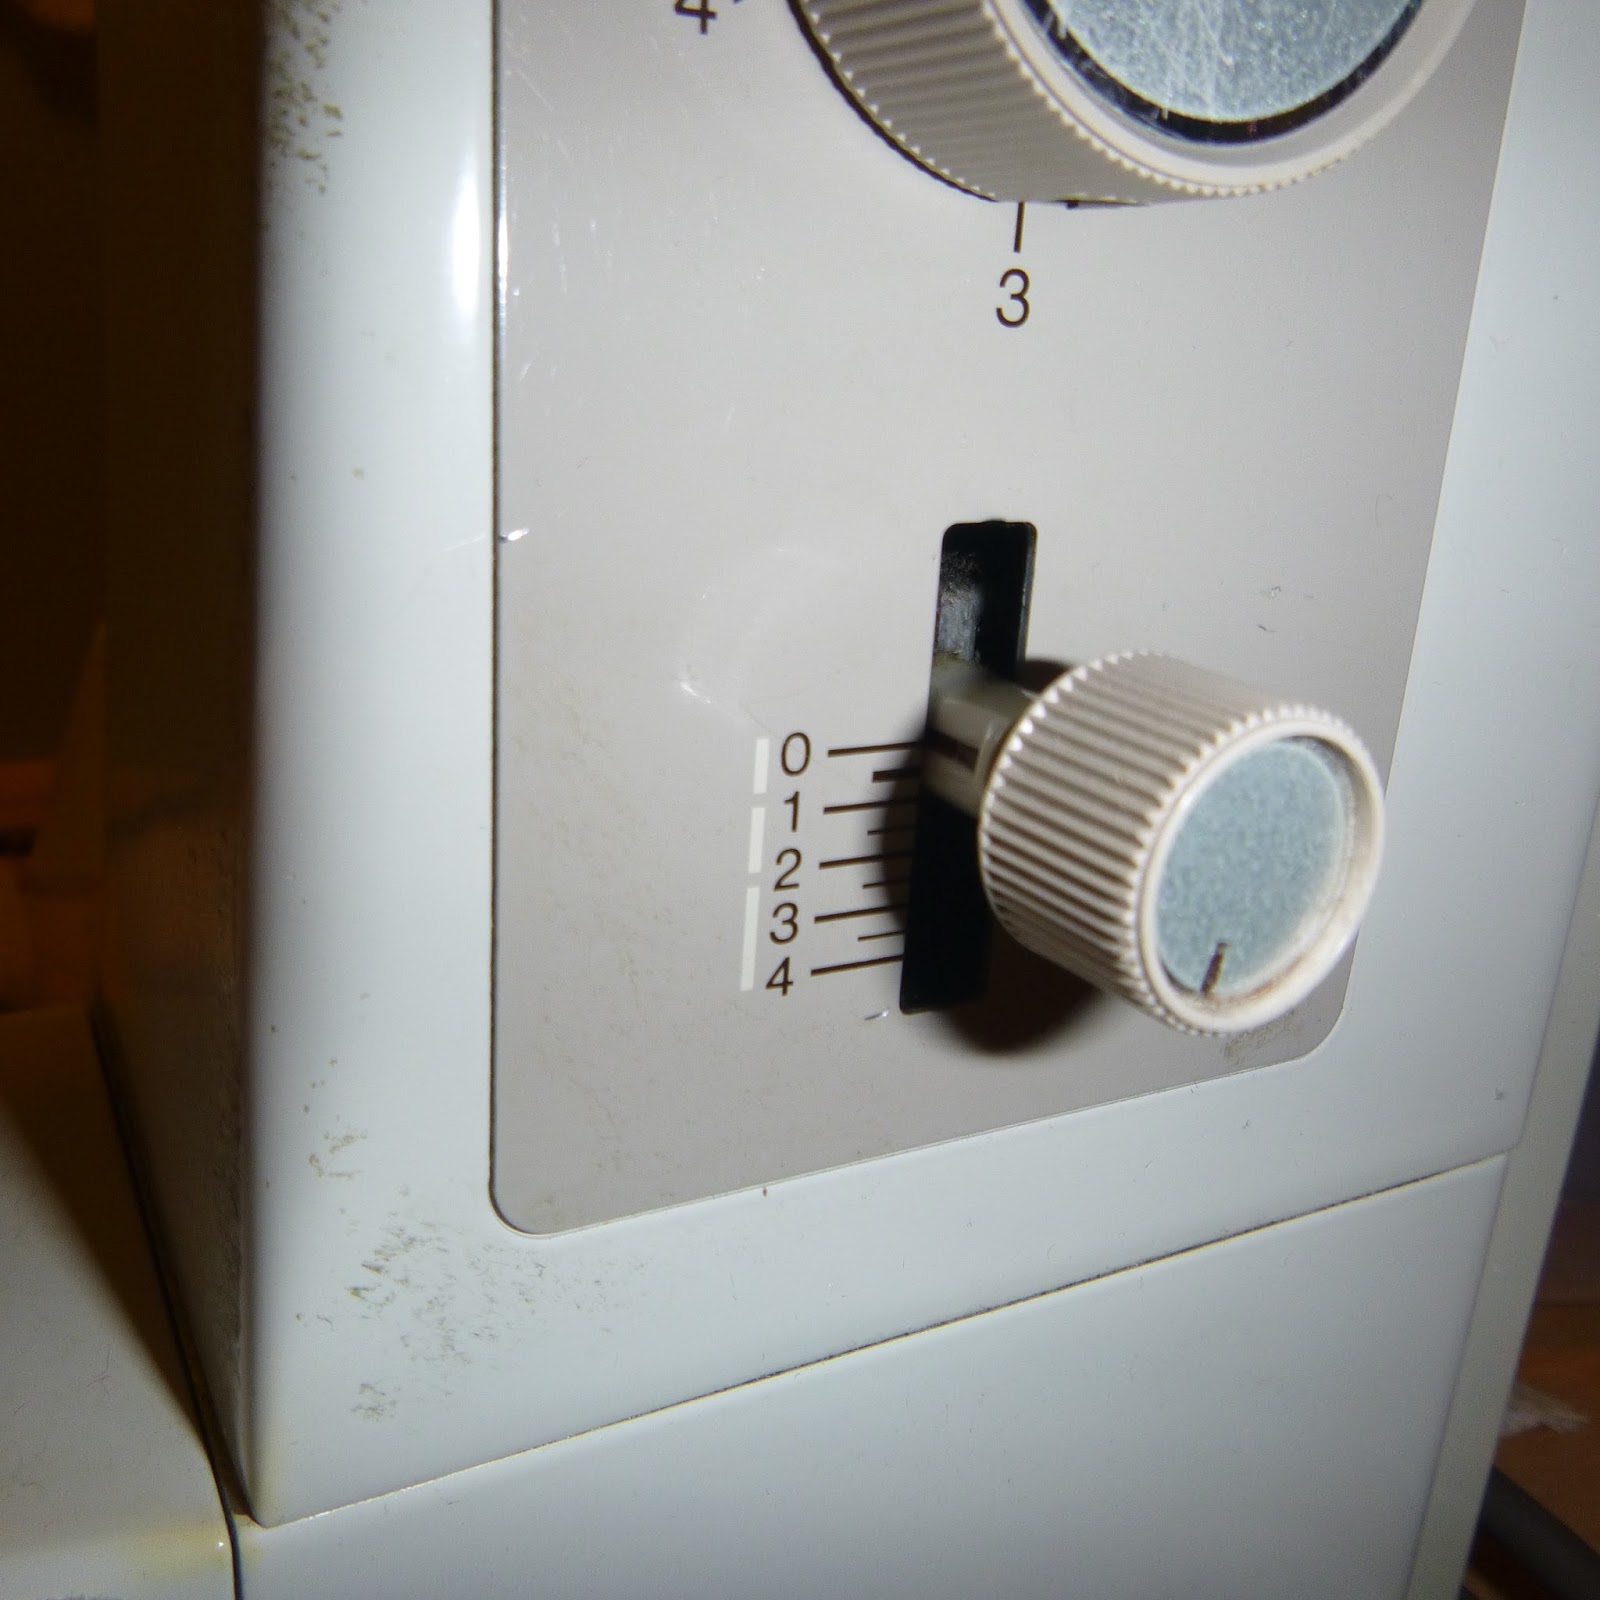
Set your stitch width to the maximum (4 on my machine) and your stitch length to the minimum (0).

Place the foot of the machine on your mark and stitch back and forth about 20 times.

Trim off the threads and repeat.

You are done!  This blanket only took an hour and fifteen minutes to make - including pictures!  Definitely, quick and easy!  :)

Here are a few more I made out on the clothesline.  A two yard cut of fabric makes a blanket long enough for a teen (although a bit narrow), a 1 2/3 yard is perfect for a child 5 to 10 years old and  a one yard cut is perfect for a baby or toddler.

It almost seems like "cheating" to make something so easy, but let me tell you, these blankets pass the kid test.  I have had to hide them away to keep my girls from claiming them for their own!  Sometimes the easiest is the best.  :)


Remember, if you make a quilt for your favorite charity this month you can win some great prizes.  More info here!